As you probably know, Cookiegeddon arrived in March 2019. To put it in a nutshell, all profiling cookies (and not) created via JavaScript are natively deleted from the browser after a short time (you should read the article for details).
I had revealed about 7 “tricks” to save yourself from Cookiegeddon but all seven are very technical, some really only for NERDS.
In short, even if technically there was some solution, the application of these “tricks” was too difficult and complicated.
A few months have passed and I have always kept my eyes open for possible variations.
One day I was updating myself on the ITP topic, and a new online service came out.
Boom! The spaceship that will save us from Cookiegeddon
I read about this service and I find out that it is the definitive solution to the problem (at least for now).
Let’s say that it uses one of the 7 “tricks” found but makes it easily manageable and above all designed for Google Tag Manager.
Wow.
I contacted their support team to test and better understand how it works.
Their sales manager answers me and we find an agreement to understand how to test their service.
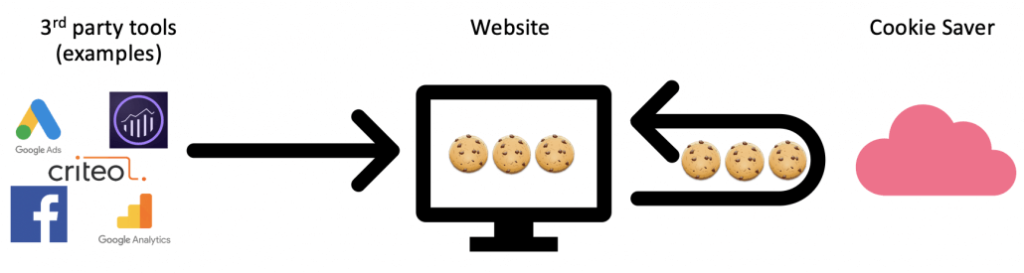
In detail, the solution lies in the fact that their system recreates the Cookie through the “trick” of CDN. In fact, it relies on server management and client-side (with GTM) and recreates the cookie.
Here is an example:
In this advanced guide, I’ll explain how to install Cookie Saver with Google Tag Manager and save yourself from Cookiegeddon.
Interview with KASPER RASMUSSEN
I had the pleasure of asking some questions to the Cookie Saver CEO and founder. Let’s see them below.
Could you introduce yourself?
Cookie Saver is a Danish based SaaS company that provides a service for any business that wish to make informed decisions around their customer journey.
What impact has ITP had on your business?
Like most other companies, with a presence on the web, we use analytics to understand the behavior of visitors to our website in order to improve the website itself, as well as focusing our marketing efforts where it works the best. With ITP 2.1, the customer journeys for Safari users was suddenly cut off after seven days, which meant, that we were no longer able to attribute traffic and conversions to the marketing channels and campaigns, that brought the visitors to our site to the same extend as before. We saw an increase in the number of new unique visitors to our website, which we might have celebrated, if we didn’t know what had caused it. Also, the retention of users fell at the same rate. So, it was clear to us, that the numbers we’re actually lying, and that it was caused by the cookies being deleted by Safari. Other thing was, that the cookie consent given by visitors also expired after seven days. This caused additional impairment of our tracking efforts, because people didn’t always accept the cookies again.
Why did you decide to create Cookie Saver?
When we first heard about ITP 2.1, we immediately knew, that it would have an enormous impact on the quality and effectiveness of marketing, personalization, etc. for companies – large and small. On their blog, Webkit has listed the intended impact of ITP 2.1, but also the unintended impact. In addition to providing more privacy to end users, the unintended impact is a huge blow to the user experience improvement provided by personalization, relevant retargeting, and much more. We created Cookie Saver to provide a way for clients to keep providing a great personalized experience for their users, as well as being able to track how their marketing efforts are working. These companies have spent a lot of time and money creating and perfecting their strategies for marketing, personalization and so on, which has suddenly lost a lot its effectiveness. We want to provide a way to mitigate the effects of the unintended side-effects of ITP 2.1 and subsequently ITP 2.2 and ITP 2.3.
Why should a company choose your service instead of using another or simply create a proprietary solution?
There are some solutions on the market. E.g. Adobe has a similar way to save the Adobe Analytics cookie. The disadvantage of solutions like that, is that it can require you to set up CNAMES DNS records and do configuration in a lot of different places, depending on the number of cookies you have, as each one only works for their respective cookies. Creating a proprietary solution is always on option, but the implementation can be tricky. It also requires you to maintain servers etc. to handle the extra generated traffic. With a service like ours, it’s relatively easy to get started, and requires minimal assistance from IT/development departments or consultants.
What will be the future of cookie tracking? Will they continue to exist?
There’s a lot of talk about the future of cookies at the moment. However, we don’t believe they’re going anywhere anytime soon. The majority of tracking, remarketing, personalization etc. relies on cookies and the underlying technologies to replace it will in our view not be changed in the near future. We do know that some of the big players in MarTech like Adobe are talking a lot of about cookieless tracking and how it will become a game-changer, but in our view there’s still a long way to go and it will initially be reserved for the bigger international brands who are already technological advanced before it may become more widely used.
Great, now I want to tell you why is Cookie Saver a service that I recommend 🙂
Why is Cookie Saver a service that I recommend
First of all, because I tried it on my skin: D Also in this case I gave a very slight contribution to the fix of some bugs that I found during the test.
The second is for its simplicity of implementation and above all for the fact that it does not bind to web platforms (WordPress, Prestashop, Magento) or to configurations in the IT field (for example on what type of server the site runs, if it is Linux, Microsoft, or in which server language is configured).
Thinking of the philosophy with I manage GTM, the Cookie Saver solution is undoubtedly the one that fits best, especially in terms of implementation.
Cool, but how much does it cost?
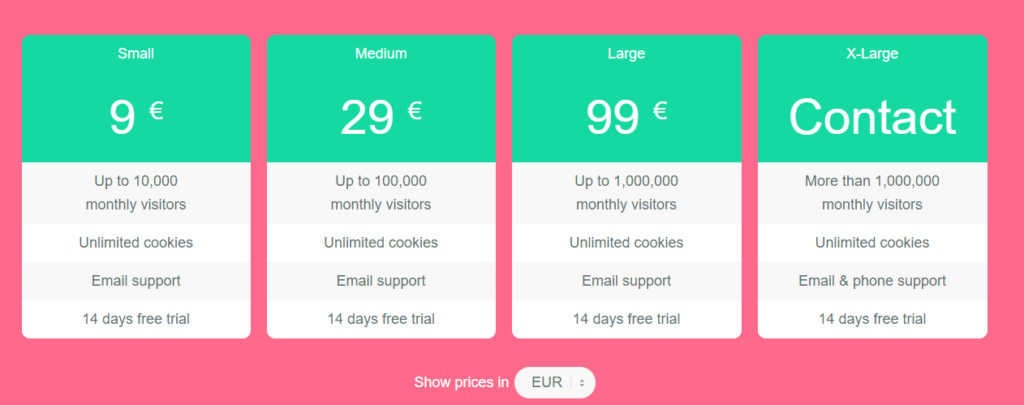
The model is SaaS so more users browse, the more you have to pay.
It starts with a € 9 pricing for 10,000 visitors per month up to € 99 for 1 million visitors per month. Obviously, if you exceed this quota there is the proper version for website traffic.
My gift for you
If you want to try this service I have good news for you 🙂
I decided to become an official reseller of this service and give you the opportunity to be followed by the Tag Manager Italia staff only and exclusively if you register from this link: CookieSaver.io
Have the list of cookie names you want to save from Cookiegeddon to insert them into a custom Google Tag Manager HTML Tag.
So to solve the problem you have to physically have the possibility of having these conditions.
Are you ready?
STEP 1 – CREATE AN ACCOUNT ON COOKIE SAVER
The first step, of course, is to have an account on Cookie Saver. I strongly recommend that you subscribe to this link as Tag Manager Italia is an official reseller (and we could give you support):
Well, now you just have to log in and go to the next step.
STEP 2 – CREATE A NEW SETUP ON COOKIE SAVER
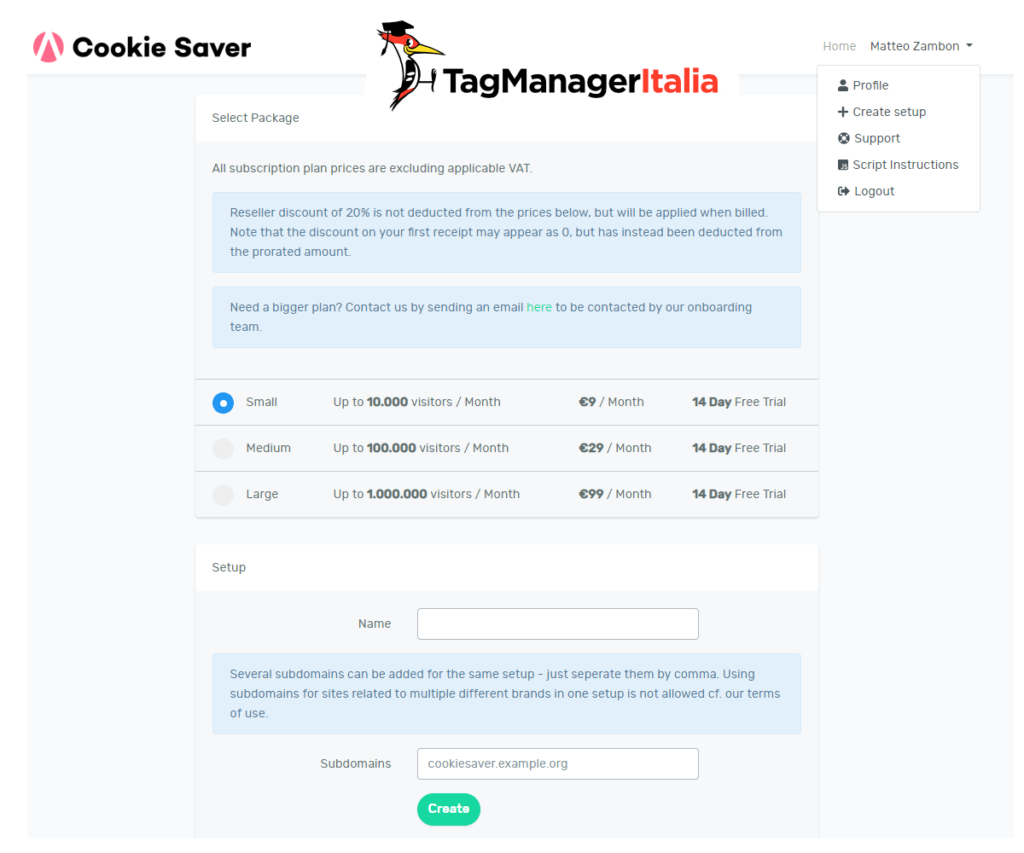
Now that you’re here, you need to create a new Cookie Saver setup.
You can do this by going to your profile by choosing “Create Setup”.
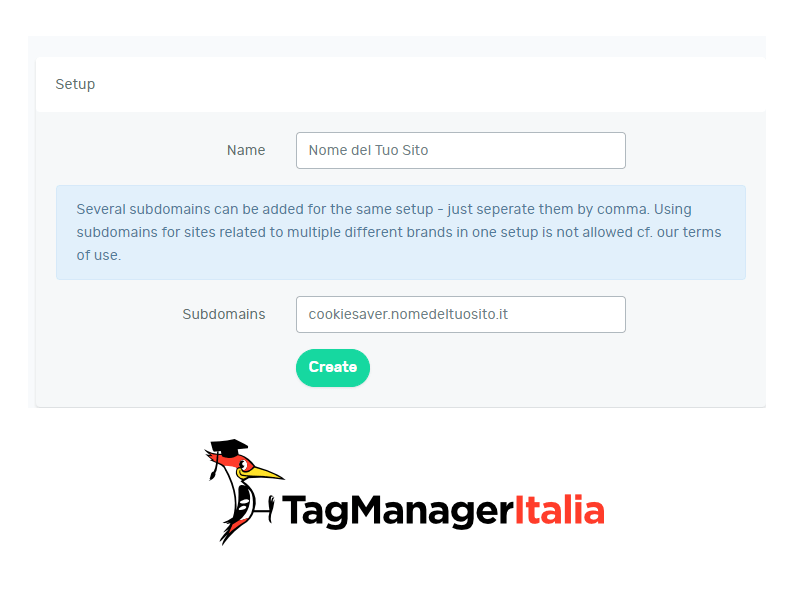
At this point, you will need to enter the Name and Subdomains.
Let’s see what it means.
Name is simply the name of your Setup. So the name you give is of no relevance.
Subdomains are the domain that Cookie Saver will use as a support to save Cookies. For example, if your site is www.nameofyoursite.it you could typecookiesaver.www.nameofyoursite.it
You can enter any value to the third/fourth level domain, obviously it must not already be present in the list of your domains 🙂
Let’s take the example that I have a domain without the www in front, so I have to do this:
Name: “Name of your site”
Subdomains: “cookiesaver.nameofyoursite.it”
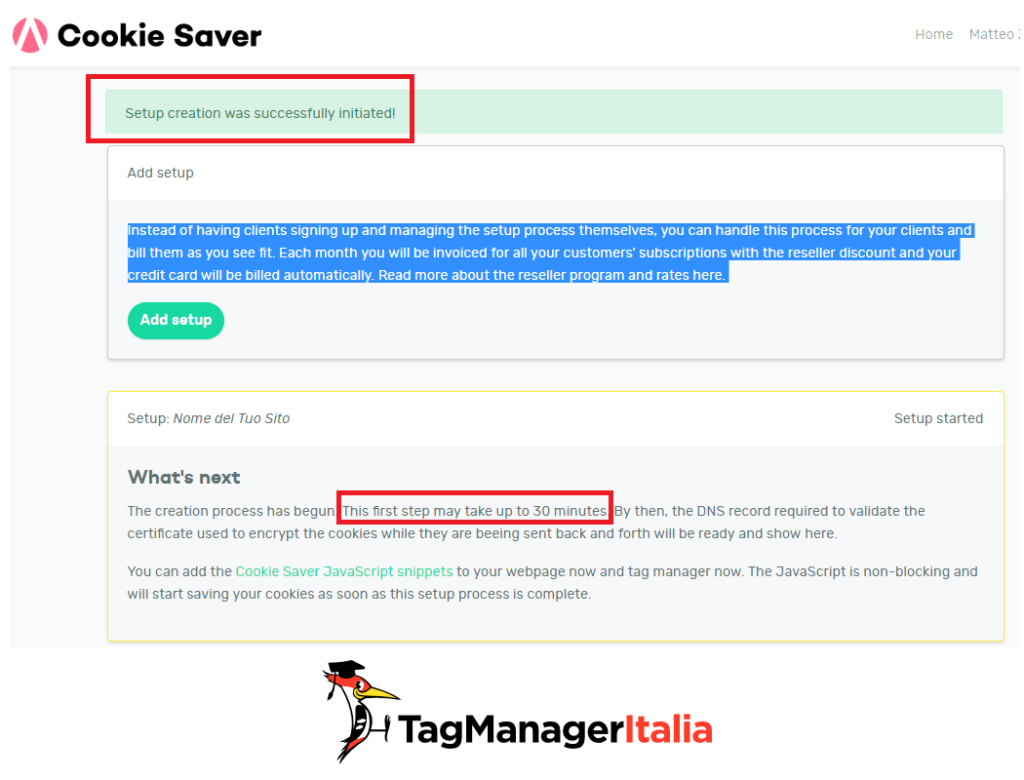
Press “Create
At this point you will have confirmation message that will invite you to wait up to a maximum of 30 minutes for the creation of the DNS by Cookie Saver.
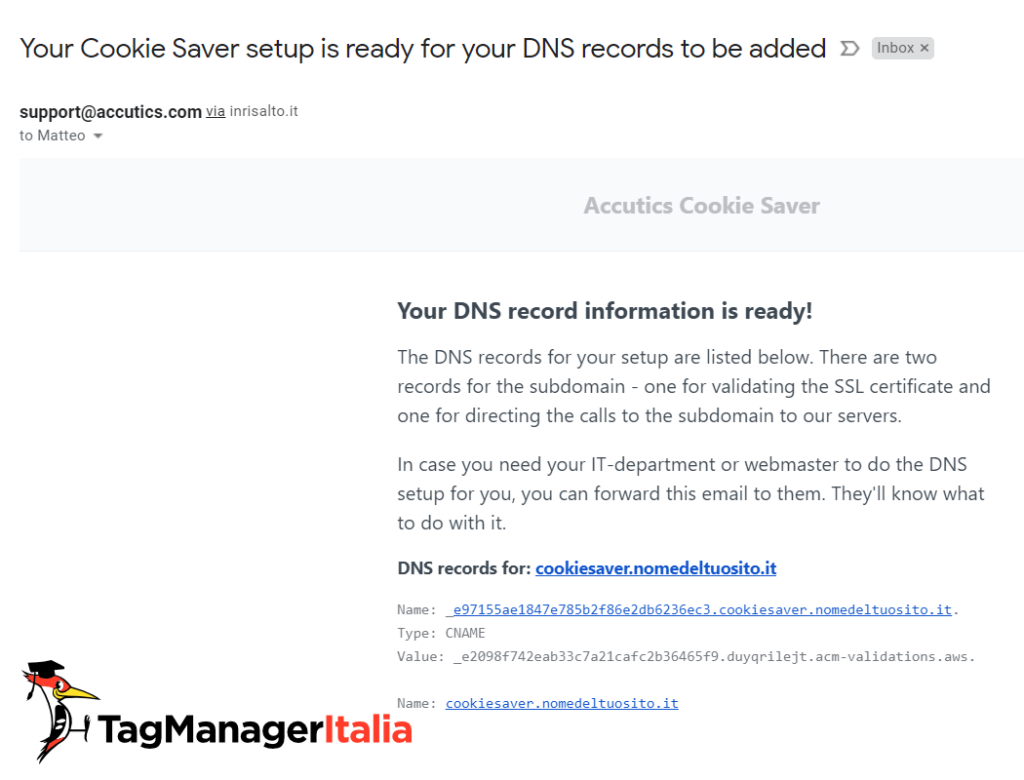
Once the necessary time has passed you will also receive an email where you will be shown the DNS records to be included in your domain management panel.
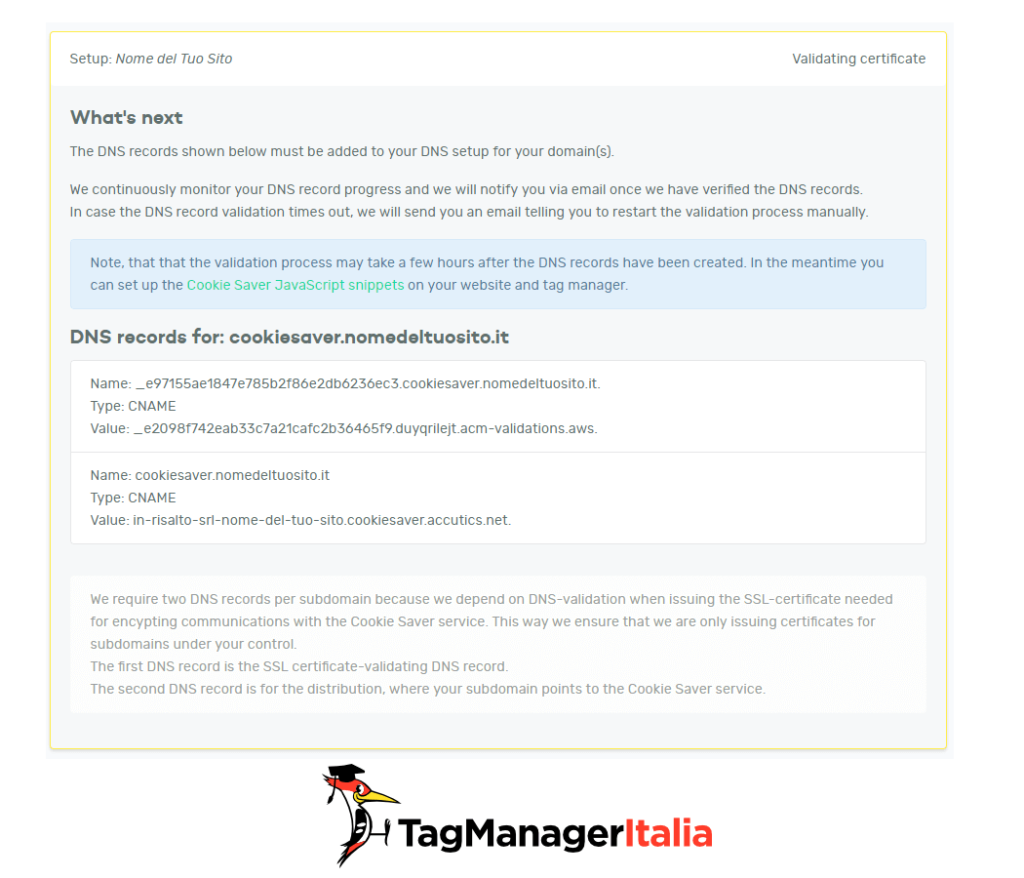
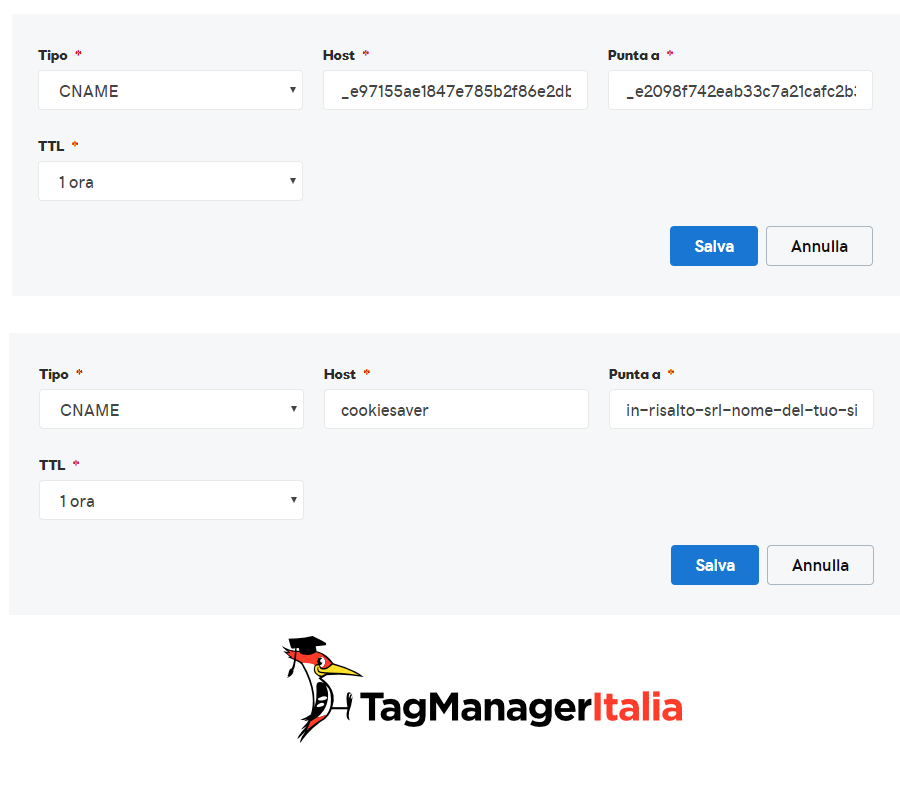
You will also have two DNS records to set in the panel:
In detail the records created in the example are these:
We just have to configure the DNS from our domain management panel.
STEP 3 – CREATE THE TWO CNAME TYPE DNS RECORDS ON YOUR DOMAIN
If you have no idea how to do it, ask the IT department or simply those who you bought the domain.
So log in to your panel (Go Daddy in my case):
And add the two DNS records CNAME type.
At this point, you will have to wait for your domain manager to apply DNS records and for Cookie Saver to see them.
[Wait]
Boom! There it is!
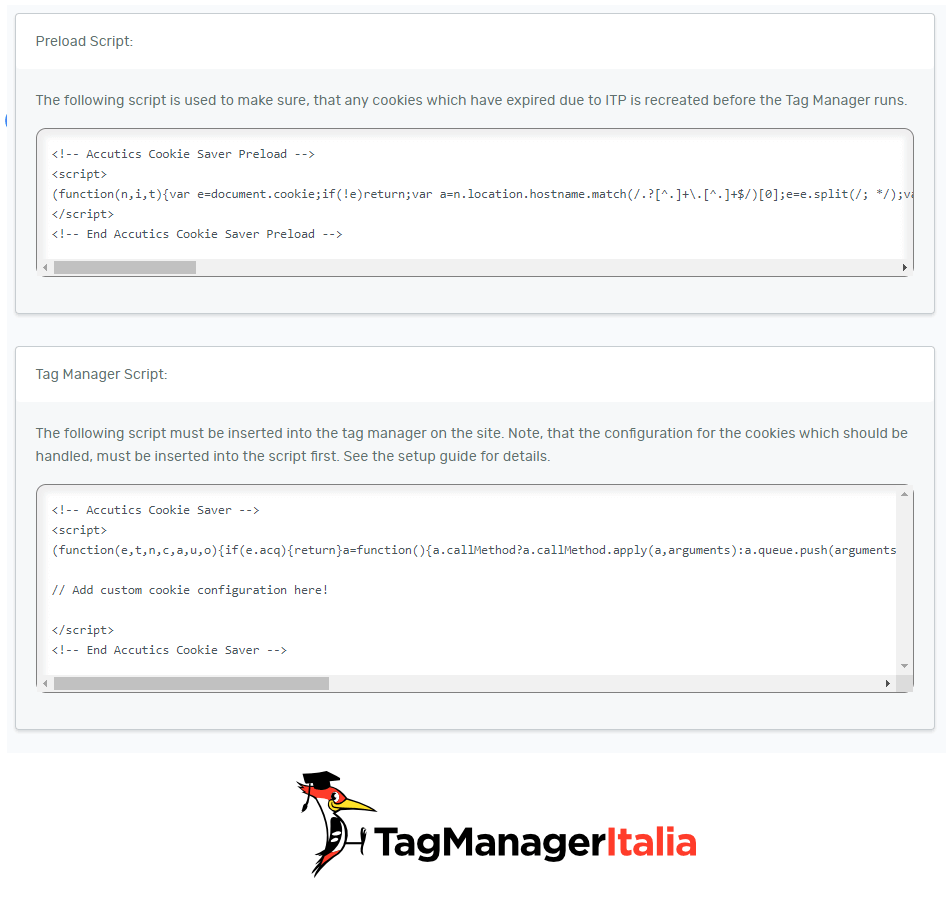
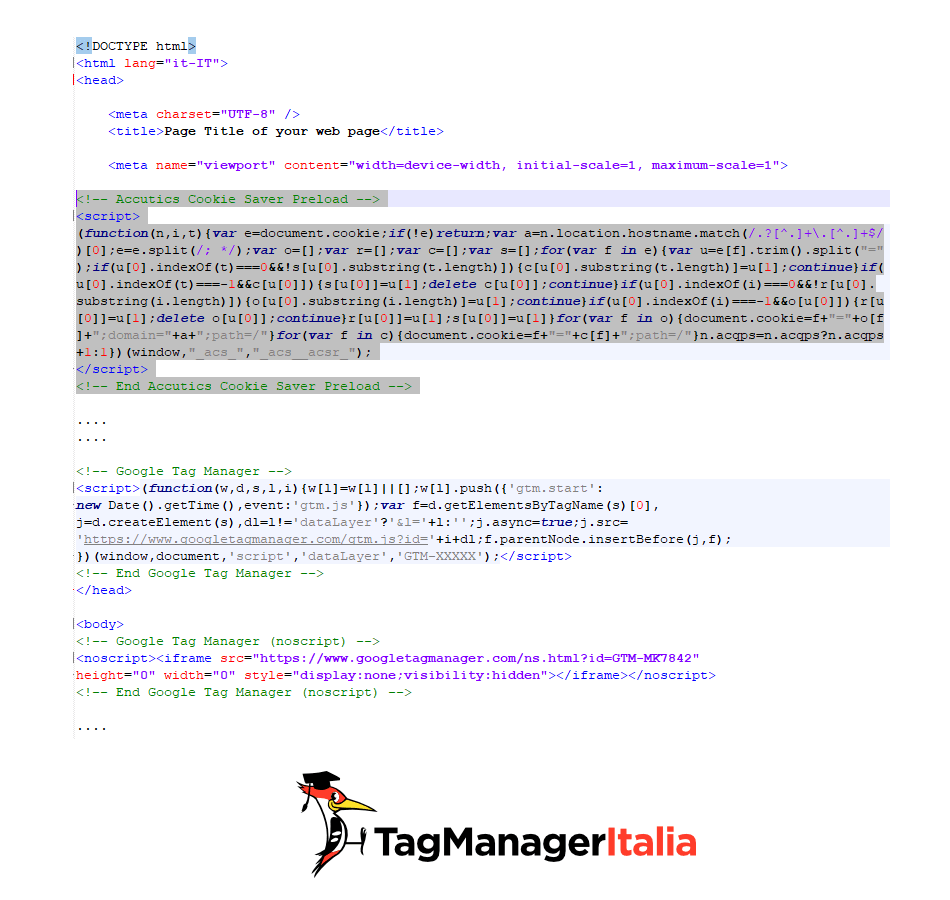
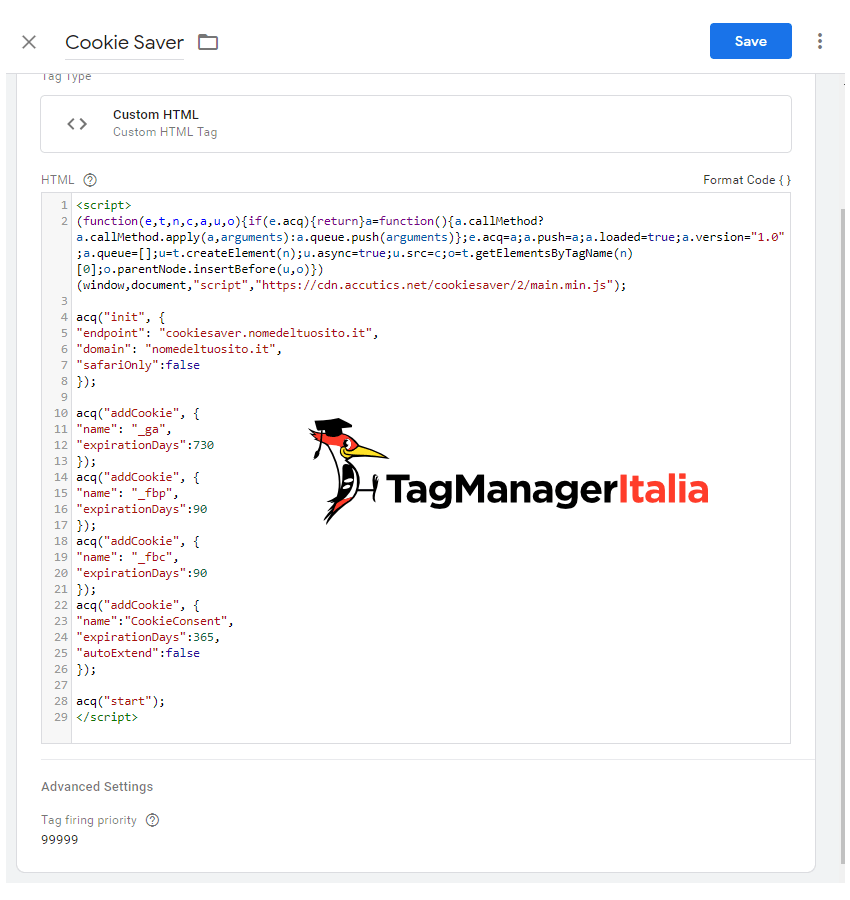
Step 4 – Insert the JavaScript script on your site
Well, everything is managed on the server-side. Now what you need to do is insert a script into all the pages of your website, BEFORE the Google Tag Manager snippet.
By default the Cookie Saver system is designed for Safari browsers only. This parameter is of the Boolean type (true or false) and by default, it is true (so if you do not put it Cookie Saver considers it to true). If you want to make it work by not caring which browser will manage the cookies, you will need to add a parameter to the name called: safariOnly.
Another parameter is httpsOnly which by default is true. If you put it to false it means that your site only responds to HTTP or both.
safariOnly we have already seen it. It is identical. By default, it is true and simply overwrites the setting that has the same parameter in the init.
domain very useful in the case which the cookie is not found in the top domain (for example nameofyoursite.it) but is located in another subdomain (for example shop.nameofyoursite.it)
autoExtend is another boolean value (true or false). By default, it is true and identifies whether the cookie’s residence time restarts from zero each time the user loads it.
backup always a boolean and identifies if you want to create a backup cookie with the prefix “_acs_”. By default it is true.
secure boolean value that tells CookieSaver to restore the original cookie as safe.
Save, put debug mode and check if everything is ok 🙂
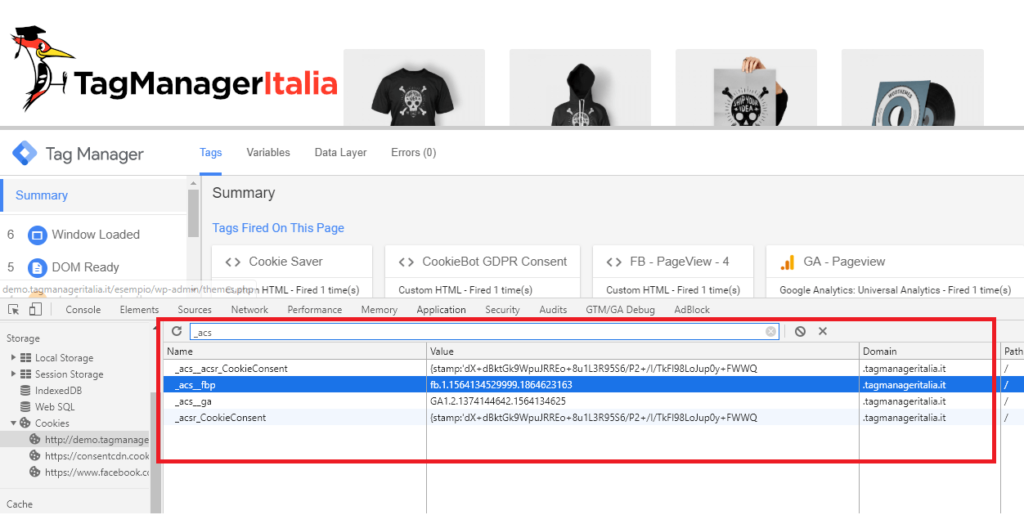
Step 7 – Check from debug mode
We just have to check if everything is actually working. To do this you must use the browser console of your browser (I will use Google Chrome) and go to cookie management.
Enable for developers: right-click or from the menu in the top right corner> other tools> Developer tool
Select the tab: Application
Side entries choose: Cookies and the site domain (in my case demo.tagmanageritalia.it)
Filter: search for “_acs” and you will find all the backup cookies
Delete a cookie: filter and delete the “_ga” cookie you should see that it recreates after a few seconds
Good job man, you did it!
We saved ourselves from Cookiegeddon
Thanks to this beautiful “trick” now you have no more excuses to continue to have the data and the tracking of your correct sites.
I remind you that if you want to try using this service you can do it with a 14-day trial 🙂