Here we are. Finally, the article you were looking for!
Do you know how conversions work in Google Analytics 4? Do you know how to track them?
Read this article, to the end (please don’t cheat 😉) and you’ll see that it is easier than what you think.
Let’s start with a key question: “How the hell do conversions work in GA4?”
WHAT ARE CONVERSIONS IN GOOGLE ANALYTICS 4?
Google Analytics 4 has introduced new ways to collect data and structural changes on the property of Google Analytics. One of these changes is the way you can measure conversions. The great thing is that the concept of Google Analytics goals is gone and It’s all event-based now.
A conversion (yes, I know you know, but let’s refresh 😉) is an important event that you want your users to complete, an interaction that you want to track in order to measure the performance of your campaigns.
An example? A document download or a newsletter subscription (i.e. a micro-conversion); a purchase, if you have e-commerce (i.e. a macro-conversion).
If you’ve been working with previous versions of Google Analytics and are used to think in terms of goals, reset everything you’ve learned and keep in mind this concept: GA4 is an event-based analysis tool. That’s it. Your aim then is to create a series of events and mark the most important ones for you as conversions. The great thing is that you straight manage the conversion within the platform.
Now, let’s get to the point. I will show you how to enable the conversion events with GA4.
Here it is.
HOW TO SETUP AND TRACK CONVERSIONS IN GA4
To configure conversions in Google Analytics 4, you have three options:
- use an existing event in your reports and enable it as a conversion
- create a new event and mark it as a conversion
- use, of course 😊, Google Tag Manager.
INTRODUCTION
Google Analytics 4 automatically marks five events as conversions. Yes, automatically, you don’t need to do anything. This is nice, isn’t it?
For app:
- first_open
- in_app_purchase
- app_store_subscription_convert
- app_store_subscription_renew
For web & app:
- purchase
If you go to your Google Analytics 4 property and click on Conversions in the menu on the left, you can see a bunch of predefined conversions that you cannot disable.

But be careful that you will see them if you have received at least one conversion event of that type.
Ok, but how do I activate them?… They are already automatically marked as conversions, so you don’t have to do anything. Easy, isn’t it?
Now let’s move on to the three cases I mention above.
- Create a New conversion event from events already collected in GA4.
- Set up a New Conversion Event from a custom event.
- Use Google Tag Manager and … It’ll be a piece of cake!
CASE 1: mark an event as a conversion
In addition, to automatically collect conversion events, you can mark as conversions up to 30 events per property and use up to 500 different event types.
Follow me and I’ll show you how to do it. Are you ready?
- Firstly, login into Google Analytics 4.
- Select the property.
- Go to the left-hand side menu and select Events > All Events.
- Then switch the toggle Mark as conversion next to the event that you want to mark as conversion
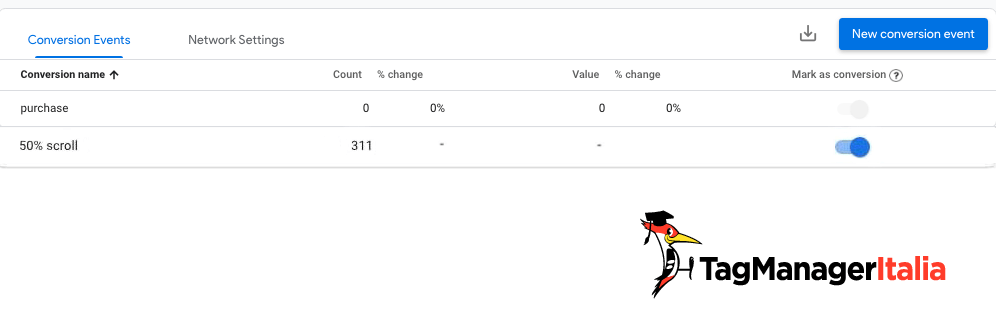
- Once you do that, wait for up to 24 hours. Then you’ll see that conversion in the list of All Conversions.
Remember that flagging an event as a conversion does not affect the data already collected, including the attribution information that are associated with that event.
To stop using an event as a conversion, can you guess what you have to do you’ll do? It is pretty easy since you just need to disable Mark as a conversion for that event.
(Remember that, the deactivation of a conversion does not affect the data already collected in this case as well).
To mark a new event as a conversion from events already collected in GA4, you also have another possible way.
Let me tell you how to do this:
- Log into Google Analytics 4.
- Select the property.
- Go to the left-hand side menu and go directly to Conversions.
- Then press New Conversion Event and enter the name of the event
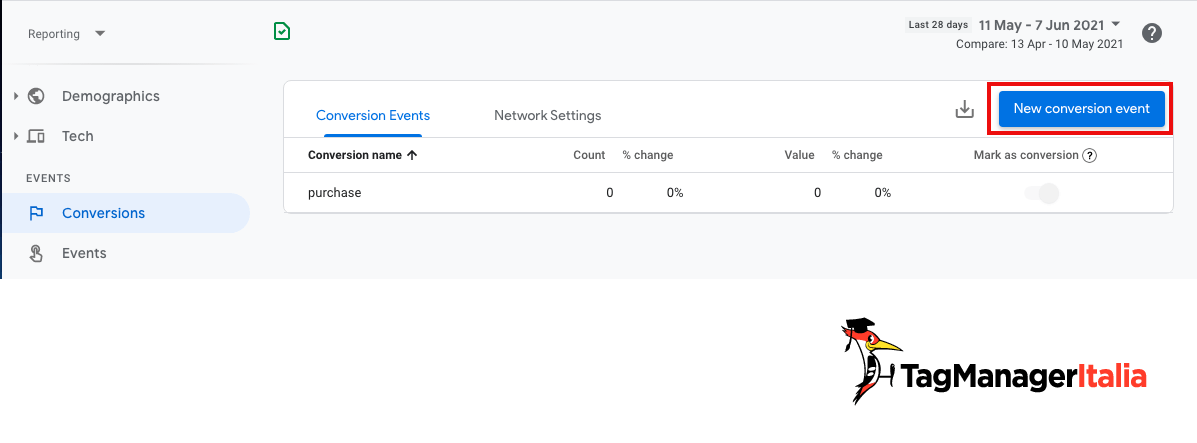
- Save…And voilà, it’s done!
Just remember that you’ll have to wait 24 hours to make sure that the configurations are successfully set up and to get the conversion data appearing in the list of all conversions.
Do you want to see more details about your conversion? Just click on it😉!
Let’s now get back to the point. Until now we have considered telling GA4 how to turn the “x” event into conversion.
But you may ask yourself
“If I haven’t created the event yet and I want to turn it on as a conversion… or if I just don’t want to mark all events as conversions…how do I do it?“
Let’s move to the next case.
CASE 2: create a NEW event and mark it as a conversion
Again, everything is very easy to do.
You can create a new event with the Create Event feature that you find straight away in the GA4 interface
- Go to All Events on your property.
- Click Create Event.
- Then click Create.
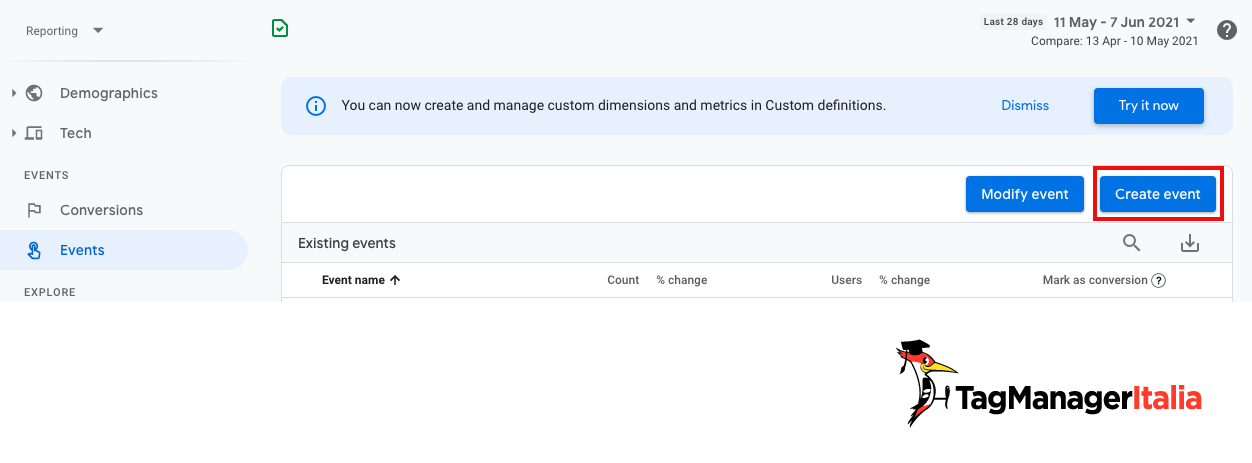
- Enter the name of your event
Here my advice is to give it a proper name that clearly communicates what it means and that it will be easy to remember. For example: if you have a Thank You Page, you may choose a name such as “Thank_you_page” and not “xz45dsfr”, does it sounds right?
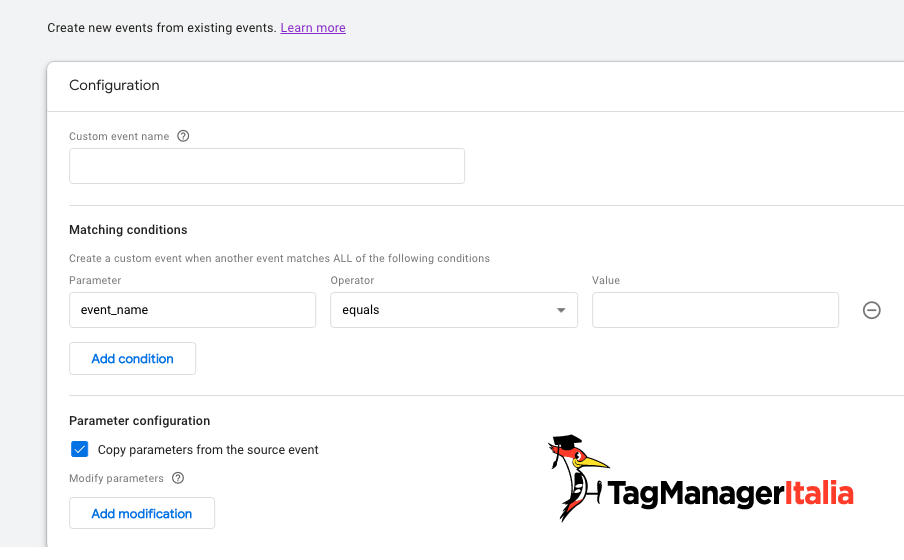
- Now that you have created the event, configure the parameters in the Matching Conditions section. If you have no idea how to do it, or you’re just a little rusty, I explain here all the steps in order to get it done.
So? … It’s not over, yet … But we’re almost there 😉
- Now go to Conversions and click New Conversion Event. Here you have to enter the name that you’ve chosen before for your event (make sure that this name corresponds exactly to what you entered)
- Click Save…That’s it, you’re done!
Let’s move on to the next case. Obviously, I’m very happy to mention Google Tag Manager!
CASE 3: use Google Tag Manager
Make a nice sigh of relief, I’m going to explain everything to you step by step.
Do you want to create a new event and turn it on into a conversion? You can clearly use Google Tag Manager to do it as well.
If you already use it to send events to Universal Analytics, you’ll just have to create a GA4 event from an trigger that you already have in Tag Manager.
Are you ready? Are you already in GTM? If not, log in to your Google Tag Manager Console.
- Click on Tag in the left-hand side menu

- Then click New > Choose Tag type> “Google Analytics: GA4 event”.
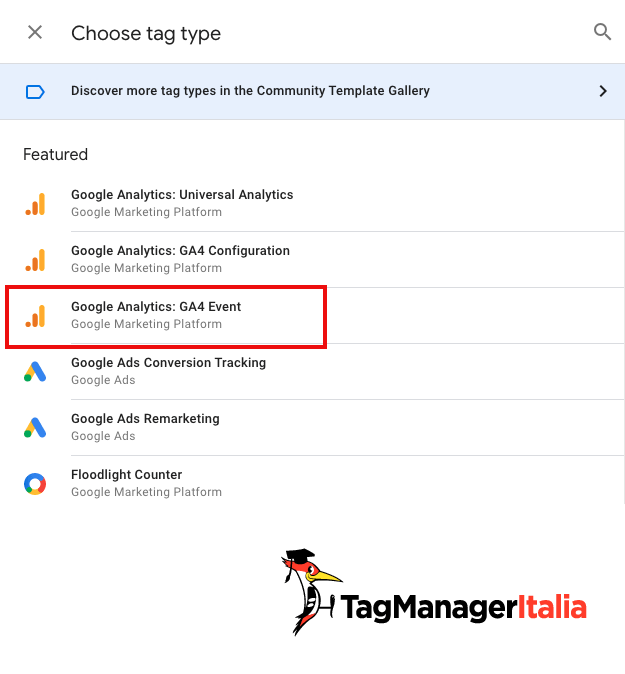
- In the tag you have to specify:
Name of the event;
Parameters you want to add
Trigger to assign to your tag (if you can’t use previously created trigger, then you have to create a new one. Here I tell you how to do it).
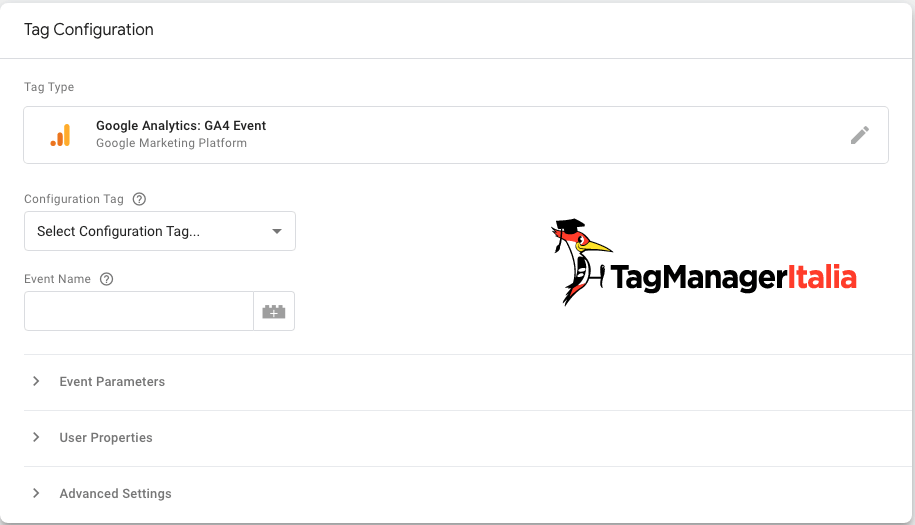
- Save the tag.
Once the Tag is saved and posted, the GA4 container will start to populate with the new custom event; again, you will need to tell GA4 to mark this event as a conversion. You will find it in the All events section in GA4. Within the section, just find the event that interests you and turn it on as a conversion.
Please note. To check, in all 3 cases, that the configuration of your conversions has been successful, you can use the DebugView function.
You’ve followed all the steps that I was suggesting and you have a clear idea of how these damn conversions work now. Well done!
There are many other things that you can do in GA4 and this is just the beginning of the adventure. My personal advice is to read the articles that I have reported below and to follow all steps there as well as to practice a lot.
And that’s it. Let me know what you think and your comments.
See you soon and… have a nice tag!
USEFUL LINKS
Chiedi pure qui sotto, sarò pronto a risponderti!
